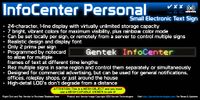
InfoCenter Personal
|
InfoCenter Personal vendor image. | |
| Creator | Nelson Jenkins |
|---|---|
| Launch year | 2012 |
| Company | Gentek |
| Availability | Marketplace & In-World |
| Marketplace Listing | |
The InfoCenter Personal is a smaller version of the InfoCenter Highway. It is a 24-character, 1-line electronic text display. It was designed to be used in commercial storefronts to attract attention and relay preprogrammed sale information; however, it can be used anywhere. Additionally, it can be controlled remotely using a server box which can control multiple signs at the same time. It was released in July 2012 along with the InfoCenter Highway.
Setup
- Rez a display and a server.
- Open the server's inventory and edit the _config notecard. Change @ID's value to something memorable - for example, if you have a display in your store window, set it to "Store Window".
- Edit the text. See "Formatting" below for more information on this. Then, save the notecard.
- Click the display and select "Set Disp ID". Then, enter the display ID you set in step 1.
Formatting
The general format for each frame of text is the following:
>3
The number of seconds for that frame. This will start a new frame, and must be preceded by the > character. Can be an integer (3) or a floating-point decimal (5.9). Do not include this line when setting custom text through the menu.
This is [g]green[/g] text
One line of text, maximum 24 characters excluding formatting codes.
Then, repeat for each frame. The default _config notecard has an example.
The InfoCenter supports the following formatting codes, used similarly to BBCode:
- [r]Text[/r] - Red
- [o]Text[/o] - Orange
- [y]Text[/y] - Yellow
- [g]Text[/g] - Green
- [b]Text[/b] - Blue
- [p]Text[/p] - Purple
- [a]Text[/a] - Amber
- [x]Text[/x] - Rainbow
Text not in these color formatting brackets is rendered white. Multiple colors can be used in the same line.
Note that these formatting codes are excluded from the maximum letter count per line.
Use the caret (^) for a full box character.
Additional Features
You can give other people access to the below configuration menus with the @ACCESS, @WHITELIST, and @BLACKLIST values. They are explained in the notecard.
The server comes with these menu functions:
- To stop text output, click it and select "Stop Text". This won't clear the text.
- To clear text on all displays with the same ID, click it and select "Clear Text".
- To set custom text without editing the notecard, click it and select "Custom Text", then put text in the input box as you would in the notecard. However, do not include the time command (e.g. >3) - just include the 1 line of text with formatting.
- To resume automatic text, click it and select "Start Text".
The display comes with some menu functions too, which can be accessed by anyone with access to the server with the same ID:
- To set a display to a single frame of text without a server, click it and select "Custom Text". This works the same as the server-side function.
- To clear a display, click it and select "Clear Text". You will want to change the display ID to something unused if you have a server running on the same ID, or else it will keep showing text.
InfoCenter API
The InfoCenter Personal can be controlled using the following LSL command:
llRegionSay(-203040506,llDumpList2String(["ICSET",displayID,text],"#$"));
So, for example:
llRegionSay(-203040506,llDumpList2String(["ICSET","Default","This is [g]green[/g] text"],"#$"));
Formatting codes can be used. This is similar to using the Custom Text option directly on the display. Note that this command is only for the InfoCenter Personal; the InfoCenter Highway has a different format.
| ||||||||||
